Enterprise Planning with Scrum


All of us love nature; some of us live close to, a few amongst it and the rest of us hit the road on weekends to get away from concrete jungles to spend time exploring it
When surrounded by nature, knowingly or unknowingly we start observing the activities happening around us. It could be the activity of birds, insects, reptiles or some animals
In the process of doing so, we stop thinking about everything else and relax our overworked minds, quietly entering in to a meditated state. This is the best thing that happens to us when surrounded by nature
And thinking is not bad for health as long as the thoughts involved don't affect the overall rythm of the body
Given our lifestyle choices, all of us might not be able to live close to nature but we can always get closer to it from our balconies and backyards
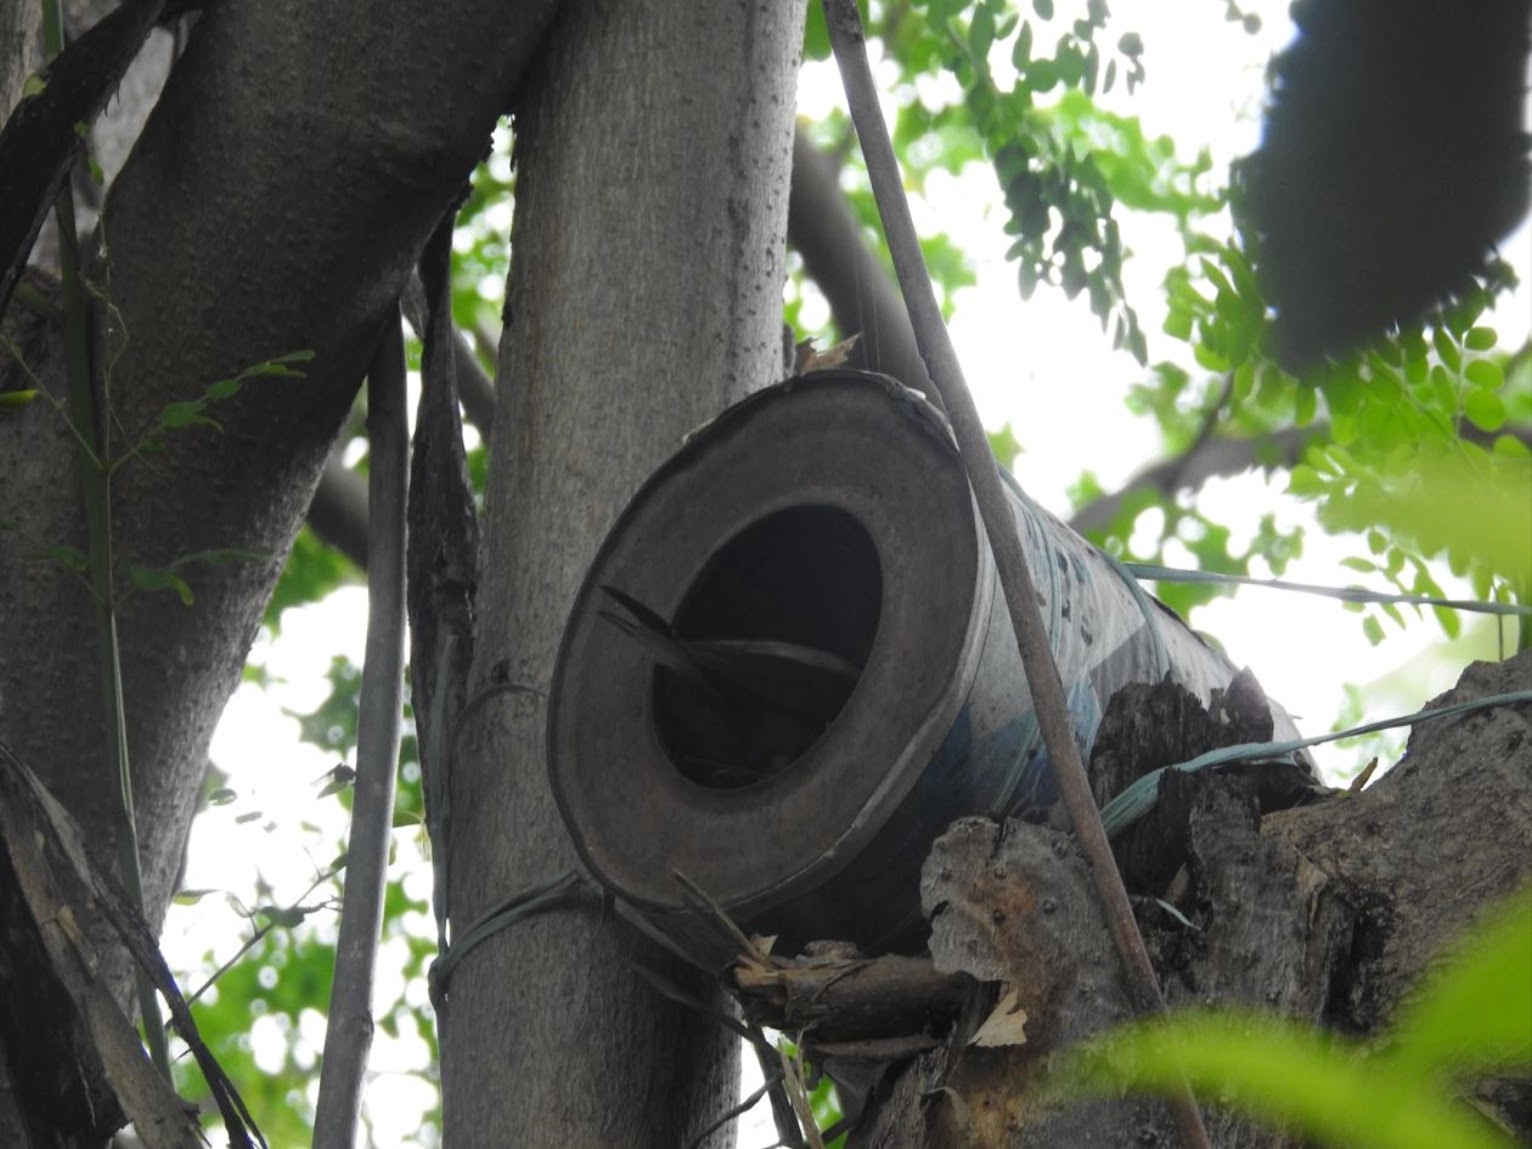
Maintain green spaces around your balcony or backyard and install a bird nest box
Identify the birds in your locality before you begin the installation of a nest box. Nest box size varies depending on the bird and not all birds would need a box
Birds like Sparrow, Robin, Owl, Parakeet do make use of nest boxes for breeding
You can build the bird nest box yourself by following the best practices or you can buy one from a reputed dealer who follows best practices
For more information visit
It should be at least 3 metres (10 feet) from ground
Installing a nest box doesn't guarantee that birds will immediately start using it. Birds have to first identify the nest box; installing it in open area frequently visited by the birds will help them find the nest box. It might take a month or sometimes a few months, be patient
Feeling threatened, the birds would abandon the nest
They can find food on their own. The purpose of the nest box is to provide them shelter during the breeding season
Usually birds use the nest box only during breeding season and the rest of the days it is empty, but they do visit it frequently to claim their ownership
If they find it suitable they definitely occupy the nest box, but sometimes if they can't see the hole in the nest box they will not occupy, make sure the nest hole is of appropriate size. It is a good practice always to use light colored material to build the box, doing so would make the hole clearly stand out. You may also place a small twig of grass on the rim of the nest hole to help them find it
It depends on the bird and its breeding cycle
It is not recommended to move the nest box once installed as it would cause inconvenience to the birds. If you are relocating to a different house or place, it would be good if you inform the future occupants about the nest box, especially if the birds are incubating the eggs or if there are chicks not yet ready to fledge
Refrain from doing so until the birds acclimate and become comfortable. Once they settle down, you may take pictures but do it inconspicuously, may be from behind a curtain or some sort of camouflage


For more information visit Scrum and Excel
The gateway to reducing your agility debt

It is easy to create a blog when we have all the information at one place. To create a blog you need to have a google account, if you have one already you are ready to go. If you don't have it create one
Login with your account in Blogger
Choose a title and the blog address that suits your blog. Choosing an address can sometimes be time taking. The blog title and the address can be updated anytime from Settings

Select a theme based on your requirement. Some themes don't allow any layout customizations, if you want to customize your layout choose themes that allow layout customizations
The next step is to select the layout, choose one depending on your requirement
Once you select a layout, it can be further customized by rearranging, adding new or removing the gadgets as needed
Layout customization is a time taking activity and you should invest some here
Once all customizations are done, take a backup of your theme
Content in the blog can be a Post or a Page
A Post is something that always appears on the Home page and every time you create a new Post it replaces the one that is already there on the Home page
A Page is static content which doesn't usually change once created. About Me and Contact Me are a good example for pages, simililarly you can create more pages
As we are discussing about pages, it is now a good time to understand the Pages Gadget

This gadget holds all the page names and page url's and creates a menu for navigation. We will look in to it in detail when we create pages
Similar to Pages Gadget there is another gadget called Blog Archive Gadget, this holds all the blog posts that we create

This page is all about you
You might want your blog visitors to contact you, let us create a Contact Me page
First we have to add Contact Form gadget to the layout and then hide it so that it does not appear on all the pages
Then we have to create a new Contact Me page and add it to the list of Pages
Add the below line of code to the blog CSS to hide the Contact Form
#ContactForm1{display:none;}

Hit the Save button after this
Create a Contact Me page with the below HTML
<div class="form">
    <form name="contact-form">
        <p></p>
        Name
        <br>
        <input class="contact-form-name" id="ContactForm1_contact-form-name" name="name" size="30" type="text" value="">
        <p></p>
        Email
        <span style="font-weight: bolder;">*</span>
        <br>
        <input class="contact-form-email" id="ContactForm1_contact-form-email" name="email" size="30" type="text"
            value="">
        <p></p>
        Message
        <span style="font-weight: bolder;">*</span>
        <br>
        <textarea class="contact-form-email-message" cols="25" id="ContactForm1_contact-form-email-message"
            name="email-message" rows="5"></textarea>
        <p></p>
        <input class="contact-form-button contact-form-button-submit" id="ContactForm1_contact-form-submit"
            type="button" value="Send">
        <p></p>
        <div style="text-align: center; max-width: 222px; width: 100%">
            <p class="contact-form-error-message" id="ContactForm1_contact-form-error-message"></p>
            <p class="contact-form-success-message" id="ContactForm1_contact-form-success-message"></p>
        </div>
    </form>
</div>
We are done with all the changes and this is how the New Blog looks like
Finally when you are done with everything, take a backup of your blog content